

Buy Now: https://www.eastwestoffroad.com/product/ewo-chevy-10-bolt-complete-crossover-high-steer-kit
A Chevy 10 Bolt Crossover High Steer Kit installation should begin with a vehicle inspection and written build plan.
The EWO system includes many of the primary steering components, but it should not be described as a universal bolt-on package.
Depending on the vehicle, installation may require:
- Compatible 2WD steering box
- Steering-box hoses or fittings
- Steering-shaft verification
- Frame inspection
- Ball-joint tools
- Drag-link fabrication
- Welding
- Alignment
- Additional replacement parts
- Wheel or brake clearance adjustments
The following checklist helps identify those requirements before the truck is disassembled.
Checklist 1: Verify the Front Axle
Confirm that the vehicle has a compatible:
- Dana 44 front axle
- Chevy/GM Corporate 10 Bolt front axle
Do not rely only on the vehicle model or year.
Inspect:
- Differential cover
- Casting marks
- Axle width
- Ball-joint design
- Knuckle configuration
- Spindle and hub
- Brake system
- Previous modifications
Potential applications include selected K5 Blazer, K10, K20, Suburban, GMC Jimmy, GMC K-series, and custom axle-swap vehicles.
Model years may span approximately 1969–1991 depending on the actual axle and vehicle configuration.
Checklist 2: Confirm Knuckle Compatibility
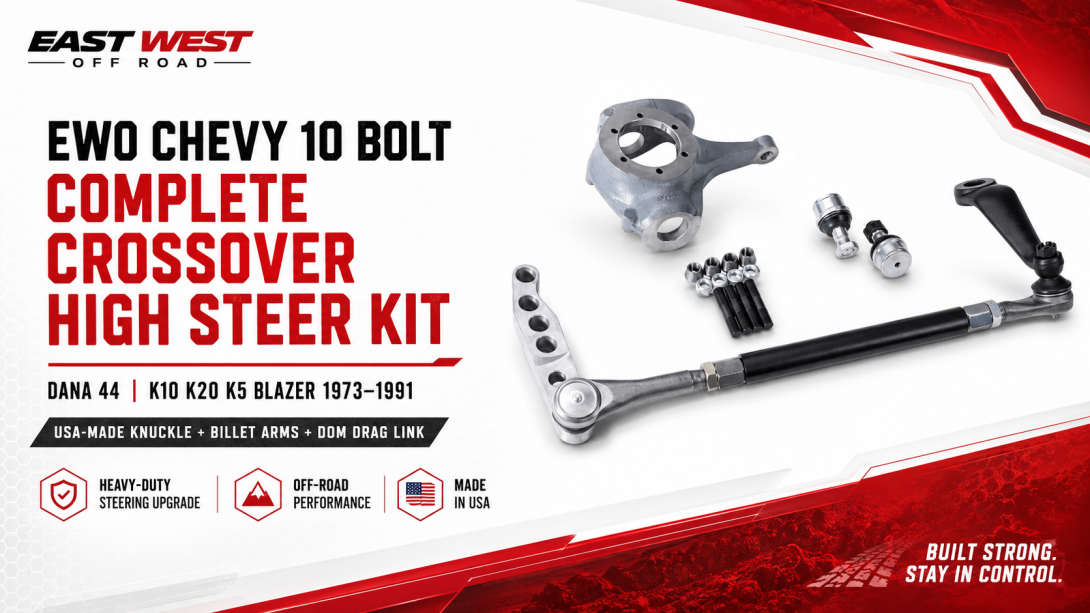
The kit includes one USA-made EWO knuckle.
Confirm compatibility with:
- Axle inner C
- Upper and lower ball joints
- Spindle
- Hub
- Brake rotor
- Caliper bracket
- Brake hose
- Wheel
- Steering stops
Complete corner mock-up should be performed before final assembly.
A knuckle that fits the ball joints may still conflict with brakes or wheels.
Checklist 3: Inspect the Existing Front End
Before installing new components, inspect:
- Wheel bearings
- Axle U-joints
- Tie rod
- Tie-rod ends
- Springs
- Shackles
- Bushings
- U-bolts
- Axle pads
- Steering shaft
- Steering-box mount
- Frame
- Wheels and tires
Repair structural and wear issues first.
The kit includes upper and lower metal-on-metal ball joints, but it does not automatically replace every worn front-end component.
Checklist 4: Plan the 2WD Steering-Box Conversion
A compatible 2WD Saginaw-style steering box is required.
The factory 4WD steering box is not suitable for the conventional crossover arrangement.
Confirm:
- Mounting pattern
- Sector-shaft size
- 32-spline pitman-arm compatibility
- Steering-box rotation
- Hydraulic ports
- Hose routing
- Steering-shaft connection
- Frame clearance
- Equal steering travel
- Box centering
The supplied pitman arm is:
- Fully indexable
- Drop forged
- Designed with a 3-inch drop
- Configured for 32 splines
Additional steering-box installation parts may be required depending on the truck.
Checklist 5: Inspect and Prepare the Frame
Larger tires and off-road use can stress the steering-box mounting area.
Check for:
- Cracks
- Rust
- Elongated holes
- Previous repairs
- Loose fasteners
- Visible flex
- Bracket damage
- Contact with engine or exhaust parts
Repair the frame before installing crossover steering.
A heavy-duty drag link should not be used to mask a weak or moving steering-box mount.
Checklist 6: Choose Taper Orientation
The EWO knuckle is supplied with a bottom-up taper.
A slit tapered insert allows an alternative bottom-down orientation.
Determine the correct direction by checking:
- Drag-link height
- Wheel clearance
- Joint articulation
- Spring clearance
- Suspension droop
- Suspension compression
- Pitman-arm alignment
- Hardware access
Do not permanently install the insert before mock-up.
Checklist 7: Mount the Billet Steering Arm
The passenger-side arm is:
- 1.25 inches thick
- Machined in-house
- Made from domestic billet
- Mounted using four Dana 9/16-inch studs
- Secured with conical washers and lock nuts
Before mounting:
- Clean all mating surfaces.
- Inspect the studs.
- Check conical-washer seating.
- Confirm full arm contact.
- Verify wheel clearance.
- Verify brake clearance.
- Check access for future inspection.
The lifetime warranty described applies to the steering arm.
Checklist 8: Measure the Drag Link
The kit includes a 43-inch D.O.M. tube with:
- 1.50-inch outside diameter
- 0.250-inch wall
- Left and right 7/8-18 weld bungs
- Left and right jam nuts
- ES2026R and ES2027L ends
Measure after:
- The axle is installed.
- The truck is at ride height.
- The steering box is centered.
- The wheels point straight ahead.
- The pitman arm is positioned.
- The knuckle and high-steer arm are installed.
- Taper direction is selected.
Leave usable adjustment range and adequate thread engagement.
Checklist 9: Arrange Qualified Welding
The drag-link tube may require:
- Cutting
- Deburring
- Tube preparation
- Weld-bung alignment
- Welding
- Distortion control
- Straightness inspection
Use a qualified automotive fabricator.
Incorrect welding can compromise a safety-critical component.
Chevy 10 Bolt Crossover High Steer Kit Preparation Table
Preparation item
Status
Axle identified
Complete / Pending
Knuckle and brake compatibility confirmed
Complete / Pending
Ball joints verified
Complete / Pending
2WD steering box selected
Complete / Pending
Pitman-arm spline confirmed
Complete / Pending
Frame inspected
Complete / Pending
Taper orientation selected
Complete / Pending
Wheel clearance checked
Complete / Pending
Drag-link length measured
Complete / Pending
Qualified welder scheduled
Complete / Pending
Alignment appointment scheduled
Complete / Pending
Do not begin fabrication while critical items remain unresolved.
Checklist 10: Cycle the Suspension
Before final road use, cycle:
- Full compression
- Full droop
- Driver-side articulation
- Passenger-side articulation
- Full left lock
- Full right lock
- Steering while articulated
Watch for:
- Drag-link binding
- Joint over-travel
- Differential-cover contact
- Spring contact
- Shock contact
- Tire contact
- Wheel contact
- Pitman-arm interference
- Steering-box binding
Correct all issues before alignment.
Checklist 11: Measure Caster and Toe
A crossover conversion does not automatically establish correct alignment.
Measure:
- Caster
- Toe
- Steering-wheel center
- Left steering travel
- Right steering travel
- Tire pressure
- Axle position
Caster affects return-to-center and straight-line stability.
Toe affects tracking and tire wear.
Professional alignment is strongly recommended.
Checklist 12: Plan the First Road Test
Begin in a controlled area.
- Turn lock-to-lock while stationary.
- Listen for contact or binding.
- Drive slowly in a straight line.
- Verify steering-wheel center.
- Make gentle turns.
- Check return-to-center.
- Cross minor uneven surfaces.
- Reinspect hardware.
- Recheck for leaks.
- Increase speed gradually.
Do not use a highway or difficult trail as the first test.
Supporting Parts That May Be Needed
Depending on the build, additional items may include:
- 2WD steering box
- Hydraulic hoses or adapters
- Steering-shaft components
- Frame repair or reinforcement parts
- Wheel bearings
- Brake parts
- Tie rod
- Tires or wheels with suitable clearance
- Spring bushings
- U-bolts
- Alignment correction components
- Fabrication supplies
These are not claimed as included in the kit.
Pre-Order Information to Gather
Before purchasing the EWO Chevy 10 Bolt crossover high-steer conversion, record:
- Vehicle year and model
- Axle model
- Axle width
- Knuckle style
- Brake configuration
- Steering-box model
- Sector-shaft spline
- Suspension lift
- Caster
- Wheel size
- Wheel backspacing
- Tire size
- Current drag-link arrangement
- Intended taper direction
- Intended vehicle use
Provide these details when requesting fitment confirmation.
Conclusion
A Chevy 10 Bolt Crossover High Steer Kit installation should not begin with cutting the drag-link tube.
Start by identifying the axle, verifying the knuckle and brakes, inspecting the frame, selecting a compatible 2WD steering box, checking wheel clearance, and planning the taper orientation.
Measure the drag link only after the steering box and wheels are centered. Use qualified welding, cycle the suspension, and complete a professional alignment before road or trail use.
FAQs
Is the kit ready to install without additional parts?
Not necessarily. A compatible 2WD steering box is required, and individual builds may need hoses, steering-shaft parts, frame work, bearings, brakes, suspension repairs, or other supporting components.
When should the D.O.M. tube be cut?
Only after the axle, knuckle, arm, steering box, and pitman arm are installed or accurately mocked up with the steering box centered.
Can I select taper direction before installing the wheel?
The wheel and tire should be included in mock-up because taper direction affects steering-end and arm clearance.
Does the kit include the tie rod?
The supplied product details describe the D.O.M. tube and ES-series ends for the drag-link assembly. Do not claim additional included parts that are not listed.
Why is professional alignment necessary?
The conversion affects steering-wheel center, drag-link length, and steering travel. Caster and toe must also be verified for safe tracking and predictable return-to-center.